How to Install a Bathroom Vanity: DIY Tips That Actually Work
Most bathroom vanity installations take a competent DIYer about three to five hours. The ones that stretch into a full weekend usually share a common problem: the prep work got rushed. Before you touch a wrench, there are measurements to confirm, shutoffs to locate, and a wall situation to understand — because drywall, tile, and plaster all behave differently when you're trying to anchor a 60-pound cabinet to them. Get that right, and the rest follows logically.
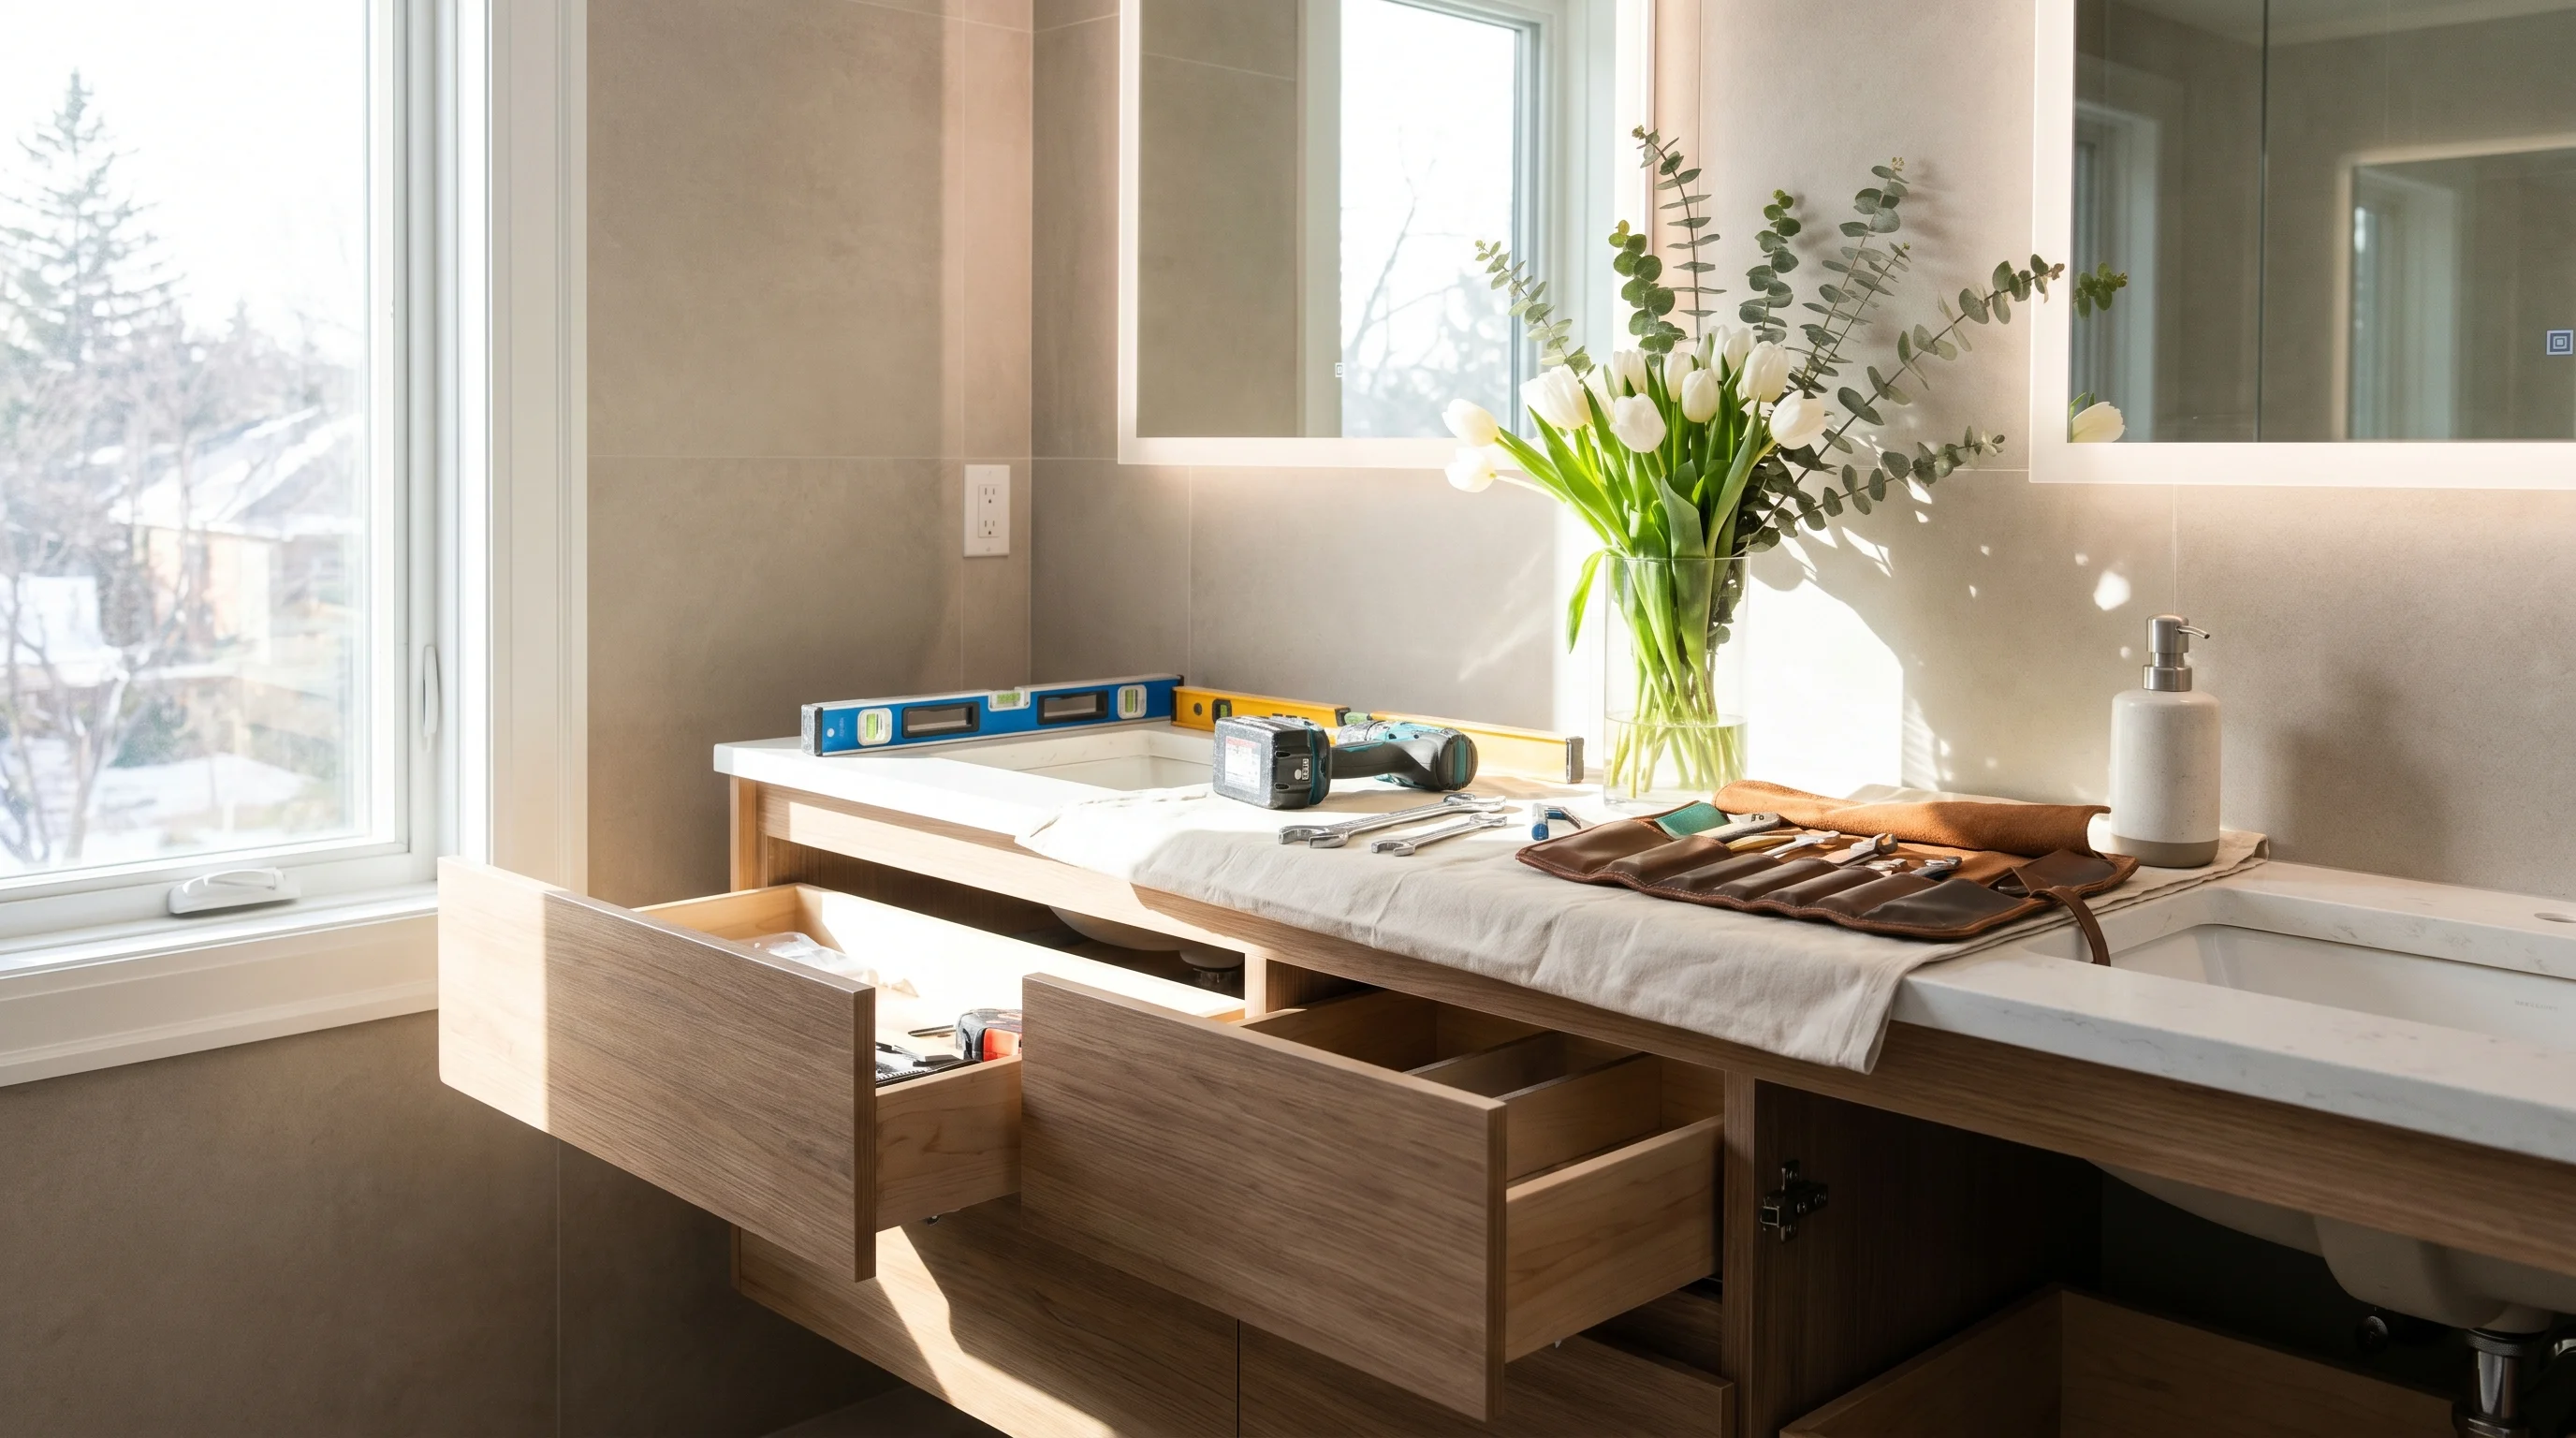
Tools and Materials You Actually Need
Don't improvise this list. Missing one item mid-install means a trip to the hardware store with the water still off.
- Stud finder — essential for anchoring the cabinet to wall framing
- Level (24" or longer) — a short level won't catch a subtle floor slope
- Adjustable wrench and basin wrench — the basin wrench gets into tight spaces under the sink
- Drill with bits — you'll need pilot holes for wall anchors or studs
- Silicone caulk and caulk gun — for sealing the countertop-to-wall joint
- Teflon tape (plumber's tape) — wrap every threaded connection
- Shims — almost every floor has some variation; shims level the cabinet before you anchor it
- Utility knife and putty knife — for removing old caulk and cleaning surfaces
- Bucket and towels — disconnecting the drain trap releases residual water
Optional but useful: a second person to hold the cabinet steady while you check level and mark anchor points. A 60-inch double-sink vanity weighs enough that solo installs get awkward fast.
Measuring Before Delivery: The Numbers That Matter
Standard vanity heights run 32 to 36 inches from floor to countertop. Most modern vanities — including every size in our lineup — are designed to hit 34 inches, which matches current building code and feels comfortable for adults. If you're replacing an older vanity that sat at 30 inches, your drain rough-in and supply lines may need extending. Check this before the new cabinet arrives.
For width, measure your available wall space at three points: left side, center, and right side. Walls aren't always parallel. If you're installing a 36-inch vanity, you want at least 37.5 inches of clear wall space — enough to slide the cabinet in without scratching the finish on adjacent tile or drywall.
Drain rough-in location matters too. Measure from the finished wall to the center of the drain pipe. For most single-sink vanities, the drain should fall roughly in the center of the cabinet depth (usually 18 to 21 inches from the wall). If your rough-in is off-center, you may need a flexible P-trap extension — available at any plumbing supply store for a few dollars.
Browse 30" vanities if you're working with a narrower wall run, or check the full collection of sizes from 24" to 60" to find your fit before measuring further.
How Pre-Assembled Cabinets Change the Install Process
A flat-pack vanity that needs assembly adds two to four hours before installation even begins — and introduces alignment issues if the carcass isn't squared perfectly during assembly. Our vanities ship fully assembled in Canada with soft-close hinges and drawer slides already installed. You're not building furniture; you're placing a finished cabinet and connecting plumbing.
The practical difference: you can realistically complete a single-sink install in an afternoon. The cabinet comes out of the box ready to level and anchor. The quartz countertop and ceramic undermount sink are included and pre-fitted, so there's no separate countertop templating, no waiting on fabrication, and no risk of a countertop arriving with the wrong cutout position.
Hardware is brushed nickel and pre-installed. You're not sourcing pulls separately or drilling handle holes. That's not a minor convenience — it eliminates a common mistake where DIYers drill handle holes slightly off-center and can't return a custom countertop.
The Installation Sequence: Step by Step
- Shut off water supply valves under the existing sink. If there are no shutoffs, turn off the main. This is also a good time to add shutoff valves if they're missing — a worthwhile upgrade before the new vanity goes in.
- Disconnect and remove the old vanity. Cut caulk along the wall and countertop edges with a utility knife. Disconnect the drain trap and supply lines. Most cabinets are screwed to the wall through a mounting rail inside the cabinet — remove those screws and the unit lifts out.
- Clean and inspect the wall and floor. Look for soft drywall (a sign of past water damage), check that the floor is structurally sound, and locate studs with your finder. Mark stud locations clearly — you'll anchor into at least two.
- Dry-fit the new cabinet. Slide it into position without connecting anything. Use your level across the top in both directions. Shim the base until it reads level front-to-back and side-to-side. Don't skip this — a cabinet that's even slightly out of level will cause drawer gaps and door misalignment over time.
- Anchor the cabinet to the wall. Drive screws through the mounting rail inside the cabinet into wall studs. Use 3-inch wood screws minimum. If studs aren't where you need them, use toggle bolts rated for the cabinet weight.
- Connect supply lines. Wrap all threaded fittings with Teflon tape (two to three wraps, clockwise). Hand-tighten first, then snug with a wrench — don't overtighten compression fittings on braided lines.
- Connect the drain. Attach the P-trap to the drain tailpiece and the wall stub-out. Hand-tight plus a quarter turn is usually sufficient for slip-joint connections.
- Caulk the countertop-to-wall joint. Use a paintable or clear silicone rated for wet areas. Run a continuous bead, smooth with a wet finger, and let it cure 24 hours before running water along that joint.
- Turn water on slowly and check every connection. Run the faucet for two minutes and inspect under the sink with a flashlight and dry paper towel. A dry paper towel shows moisture that a quick glance misses.
Common Mistakes That Cost Time and Money
Not checking the drain rough-in height. If the wall stub-out is too low, your P-trap won't have enough drop to drain properly. The fix is a longer tailpiece or adjusting the trap — not difficult, but you need to know before the cabinet is anchored.
Skipping the backsplash seal. Our vanity sets include a backsplash panel. Install it before caulking, and caulk both where it meets the countertop and where it meets the wall. Water that gets behind a backsplash causes the wall damage that turns a simple vanity swap into a drywall repair job.
Over-tightening the faucet mounting nut. Ceramic sinks crack under excessive torque. Hand-tight plus a firm quarter-turn is enough. If the faucet wiggles, use the plastic spacer that comes with most faucets to fill the gap between the faucet base and the sink surface.
If you run into a specific situation — unusual rough-in location, an older home with non-standard plumbing, or a wall that's anything but flat — message us on WhatsApp at (647) 428-1111. We've seen most scenarios and can point you toward the right approach before you're mid-install.
Ready to start? Browse the full vanity collection — complete sets in White, Grey, and Blue, from $499 for a 24-inch up to $1,299 for a 60-inch double sink, with free warehouse pickup or delivery to your door anywhere in the GTA. More installation and buying guides are available on the Modern Vanity blog.