Every Tool You Need to Install a Bathroom Vanity (And Nothing Extra)
Most bathroom vanity installations don't fail at the hard part — the plumbing or the leveling. They fail at the prep stage, when someone realizes mid-job that they're missing a basin wrench, or that they never confirmed the rough-in drain location before the new cabinet was already sitting in the middle of the bathroom. Getting the tools sorted before demo day is the difference between a four-hour install and a two-day headache.
Measure First — These Numbers Determine Everything
Before you touch a tool, you need three measurements written down: the width of your vanity opening (wall to wall, or wall to toilet, whichever is tighter), the height of your existing drain rough-in from the finished floor, and the depth available from the wall to any obstacle in front of it. Standard vanity depth runs 18 to 21 inches — most GTA bathrooms accommodate this without issue, but older homes sometimes have baseboards, trim, or angled walls that eat into that number.
Also note your drain rough-in height. A standard P-trap rough-in sits between 18 and 20 inches from the floor. If yours is higher or lower, you'll need an adjustable P-trap — a cheap fix if you know about it in advance, a frustrating surprise if you don't.
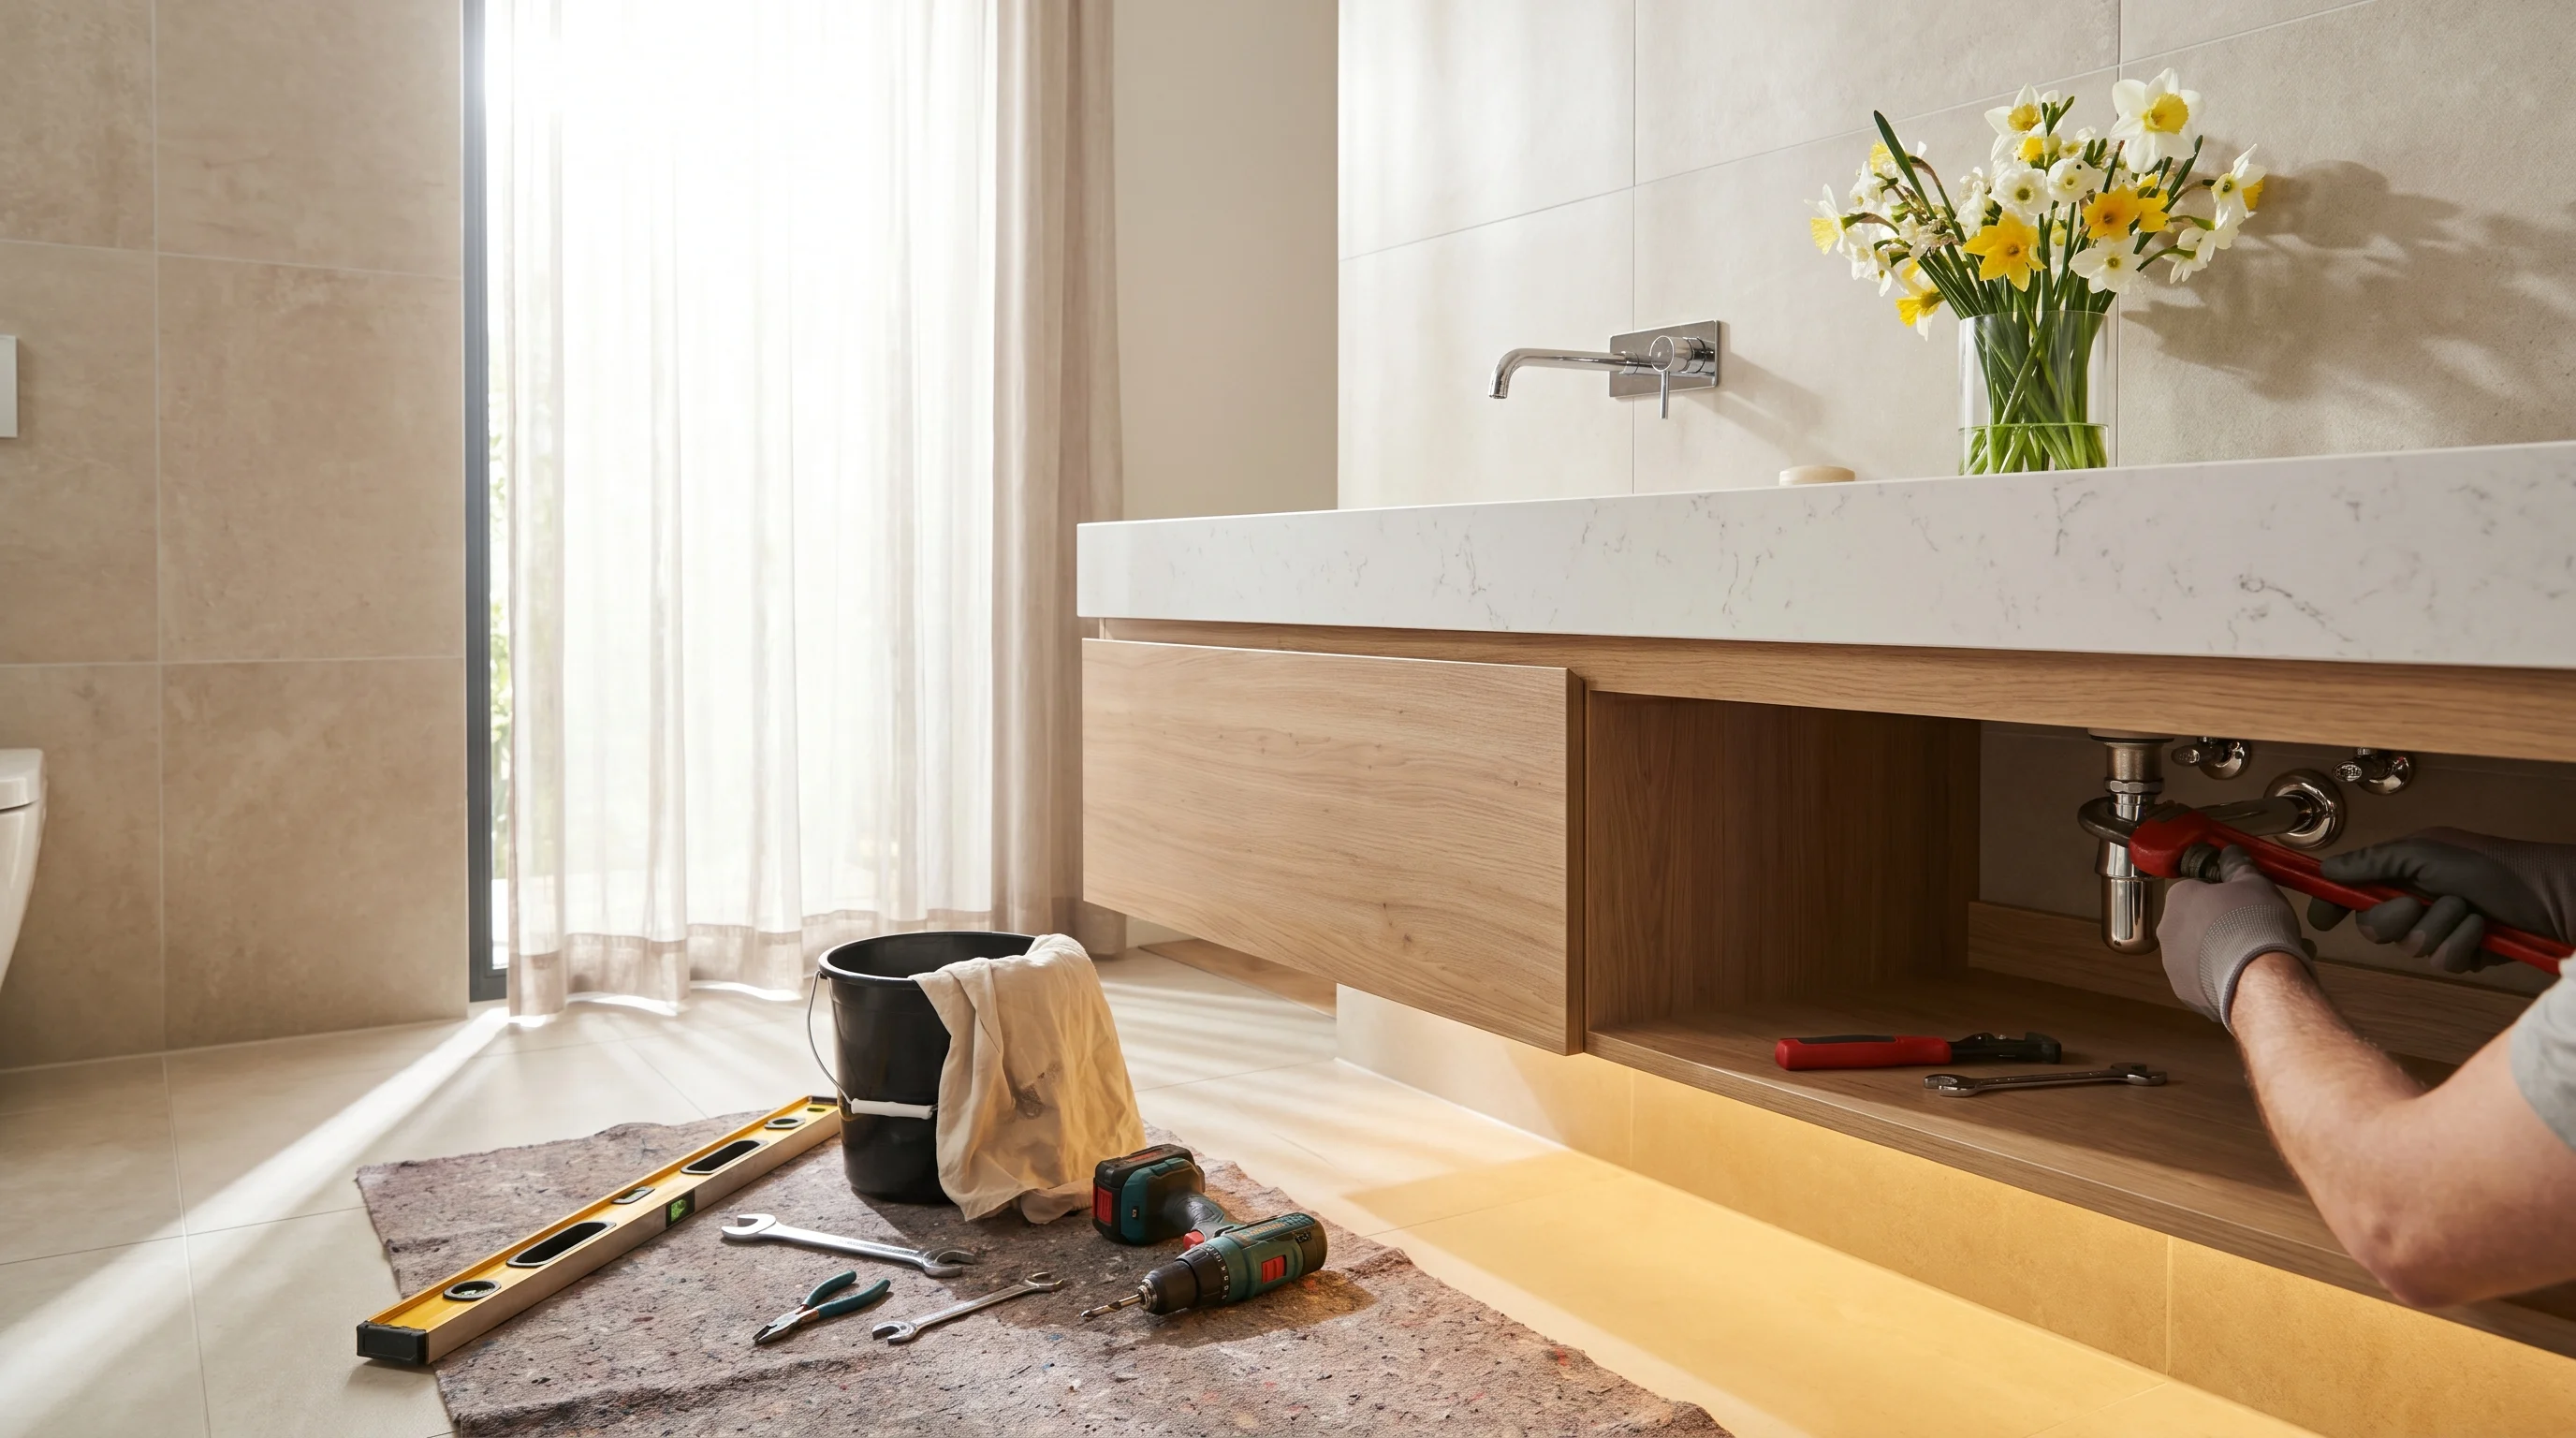
The Core Tool List: What You Actually Need
This covers a standard vanity swap — removing an old unit and installing a new one with an included countertop, sink, and faucet. For a first-time installation in a new rough-in, add a plumber for the supply line connections if you're not comfortable with compression fittings.
- Tape measure — minimum 25 ft; you'll use it constantly
- Level — a 4-foot level is ideal for checking the cabinet front-to-back and side-to-side before securing
- Stud finder — vanity cabinets must anchor to studs, not just drywall
- Drill/driver — cordless, with a #2 Phillips bit and a set of drill bits
- Adjustable wrench — for supply line connections and drain assembly
- Basin wrench — the one tool most people forget; it's the only way to tighten faucet mounting nuts in a tight cabinet space
- Utility knife — for scoring old caulk and cutting shims
- Pry bar (small) — for removing the old vanity top or cabinet without wrecking the wall
- Bucket and towels — shut off the supply valves, then disconnect; there will still be water
- Silicone caulk + caulk gun — 100% silicone, not latex; use it around the sink perimeter and where the backsplash meets the wall
- Shims — wood or composite; bathrooms are almost never perfectly level
- Hacksaw or oscillating tool — only if you need to cut the drain tailpiece to length
- Plumber's putty or plumber's tape (Teflon) — for drain fittings
What You Don't Need (If Your Vanity Arrives Pre-Assembled)
One reason pre-assembled vanities save real time on installation day: you skip an entire category of tools. There's no flat-pack assembly, no cam locks to align, no trying to square a cabinet box on your bathroom floor. The cabinet arrives ready to position and anchor.
All Modern Vanity sets ship fully assembled — HDF cabinet, soft-close hinges, soft-close drawer slides, and brushed nickel hardware all pre-installed. The quartz countertop and ceramic undermount sink are included as a unit. You're not cutting, drilling, or mounting a sink into a countertop on-site. That work is already done.
What this means practically: you don't need a jigsaw for a sink cutout, you don't need a router or hole saw for faucet drilling (it's pre-drilled), and you don't need clamps or epoxy for a countertop-to-cabinet bond. That's a meaningful reduction in tools and risk for a DIY install.
The Installation Sequence — Where Each Tool Gets Used
- Shut off water supply valves under the existing sink. Open the faucet to release pressure.
- Disconnect supply lines (adjustable wrench) and the P-trap (by hand or with pliers).
- Remove the old countertop — score the caulk with a utility knife, then pry carefully with a small pry bar.
- Remove the old cabinet — locate the screws anchoring it to the wall (stud finder, drill/driver) and pull it out.
- Position the new cabinet — slide it into place, check level front-to-back and side-to-side, shim the base as needed.
- Anchor to studs — drill pilot holes through the cabinet back rail, drive 2.5" screws into studs. Don't overtighten.
- Set the countertop — apply a bead of silicone to the top of the cabinet, lower the countertop into position, press firmly.
- Connect the drain assembly — hand-tighten the drain body into the sink, connect the P-trap to the drain rough-in. Use an adjustable P-trap if your rough-in height doesn't align.
- Install the faucet — use the basin wrench to tighten the mounting nuts from underneath. Connect supply lines.
- Turn water on slowly, check every connection for drips, then caulk the backsplash-to-wall seam and around the sink perimeter.
For a 30" vanity, most experienced DIYers complete this sequence in three to four hours. Larger units like a 48" or 60" double-sink vanity add time mainly at the plumbing stage — two drains, two sets of supply lines, more caulking.
A Few Things Worth Knowing Before You Start
Silicone caulk is non-negotiable around the sink. Latex caulk shrinks, cracks, and lets water into the cabinet over time. Use 100% silicone in a colour that matches your countertop or grout — white or clear both work on quartz.
If your wall is out of plumb (common in older GTA homes), shim the cabinet base until it's level before anchoring. A cabinet that's level but the wall isn't will look fine. A cabinet anchored tight to an out-of-plumb wall will look crooked and the doors won't close properly.
Check that your shut-off valves actually shut off before you disconnect anything. In older homes, these valves sometimes fail. If yours don't close fully, you'll need to shut off at the main before proceeding.
Have questions about sizing or which set works for your bathroom layout? Message us on WhatsApp at (647) 428-1111 — we're straightforward about what fits and what doesn't.
When you're ready to order, browse the full collection — complete sets in White, Grey, and Blue, from $499 for a 24" up to $1,299 for a 60" double-sink, with free warehouse pickup or delivery to your garage or inside your home across the GTA. Check the FAQ for delivery details and lead times before you plan your install date.