How to Install a Bathroom Vanity on an Uneven Floor
Most bathroom floors aren't perfectly flat — and older GTA homes are especially prone to sloped subfloors, tile lippage, and out-of-level surfaces that can throw off a vanity install by a surprising amount. A ½-inch slope across 36 inches is enough to make cabinet doors swing open on their own, create visible gaps at the toe kick, and put uneven stress on your plumbing connections. The fix isn't complicated, but it does require doing things in the right order.
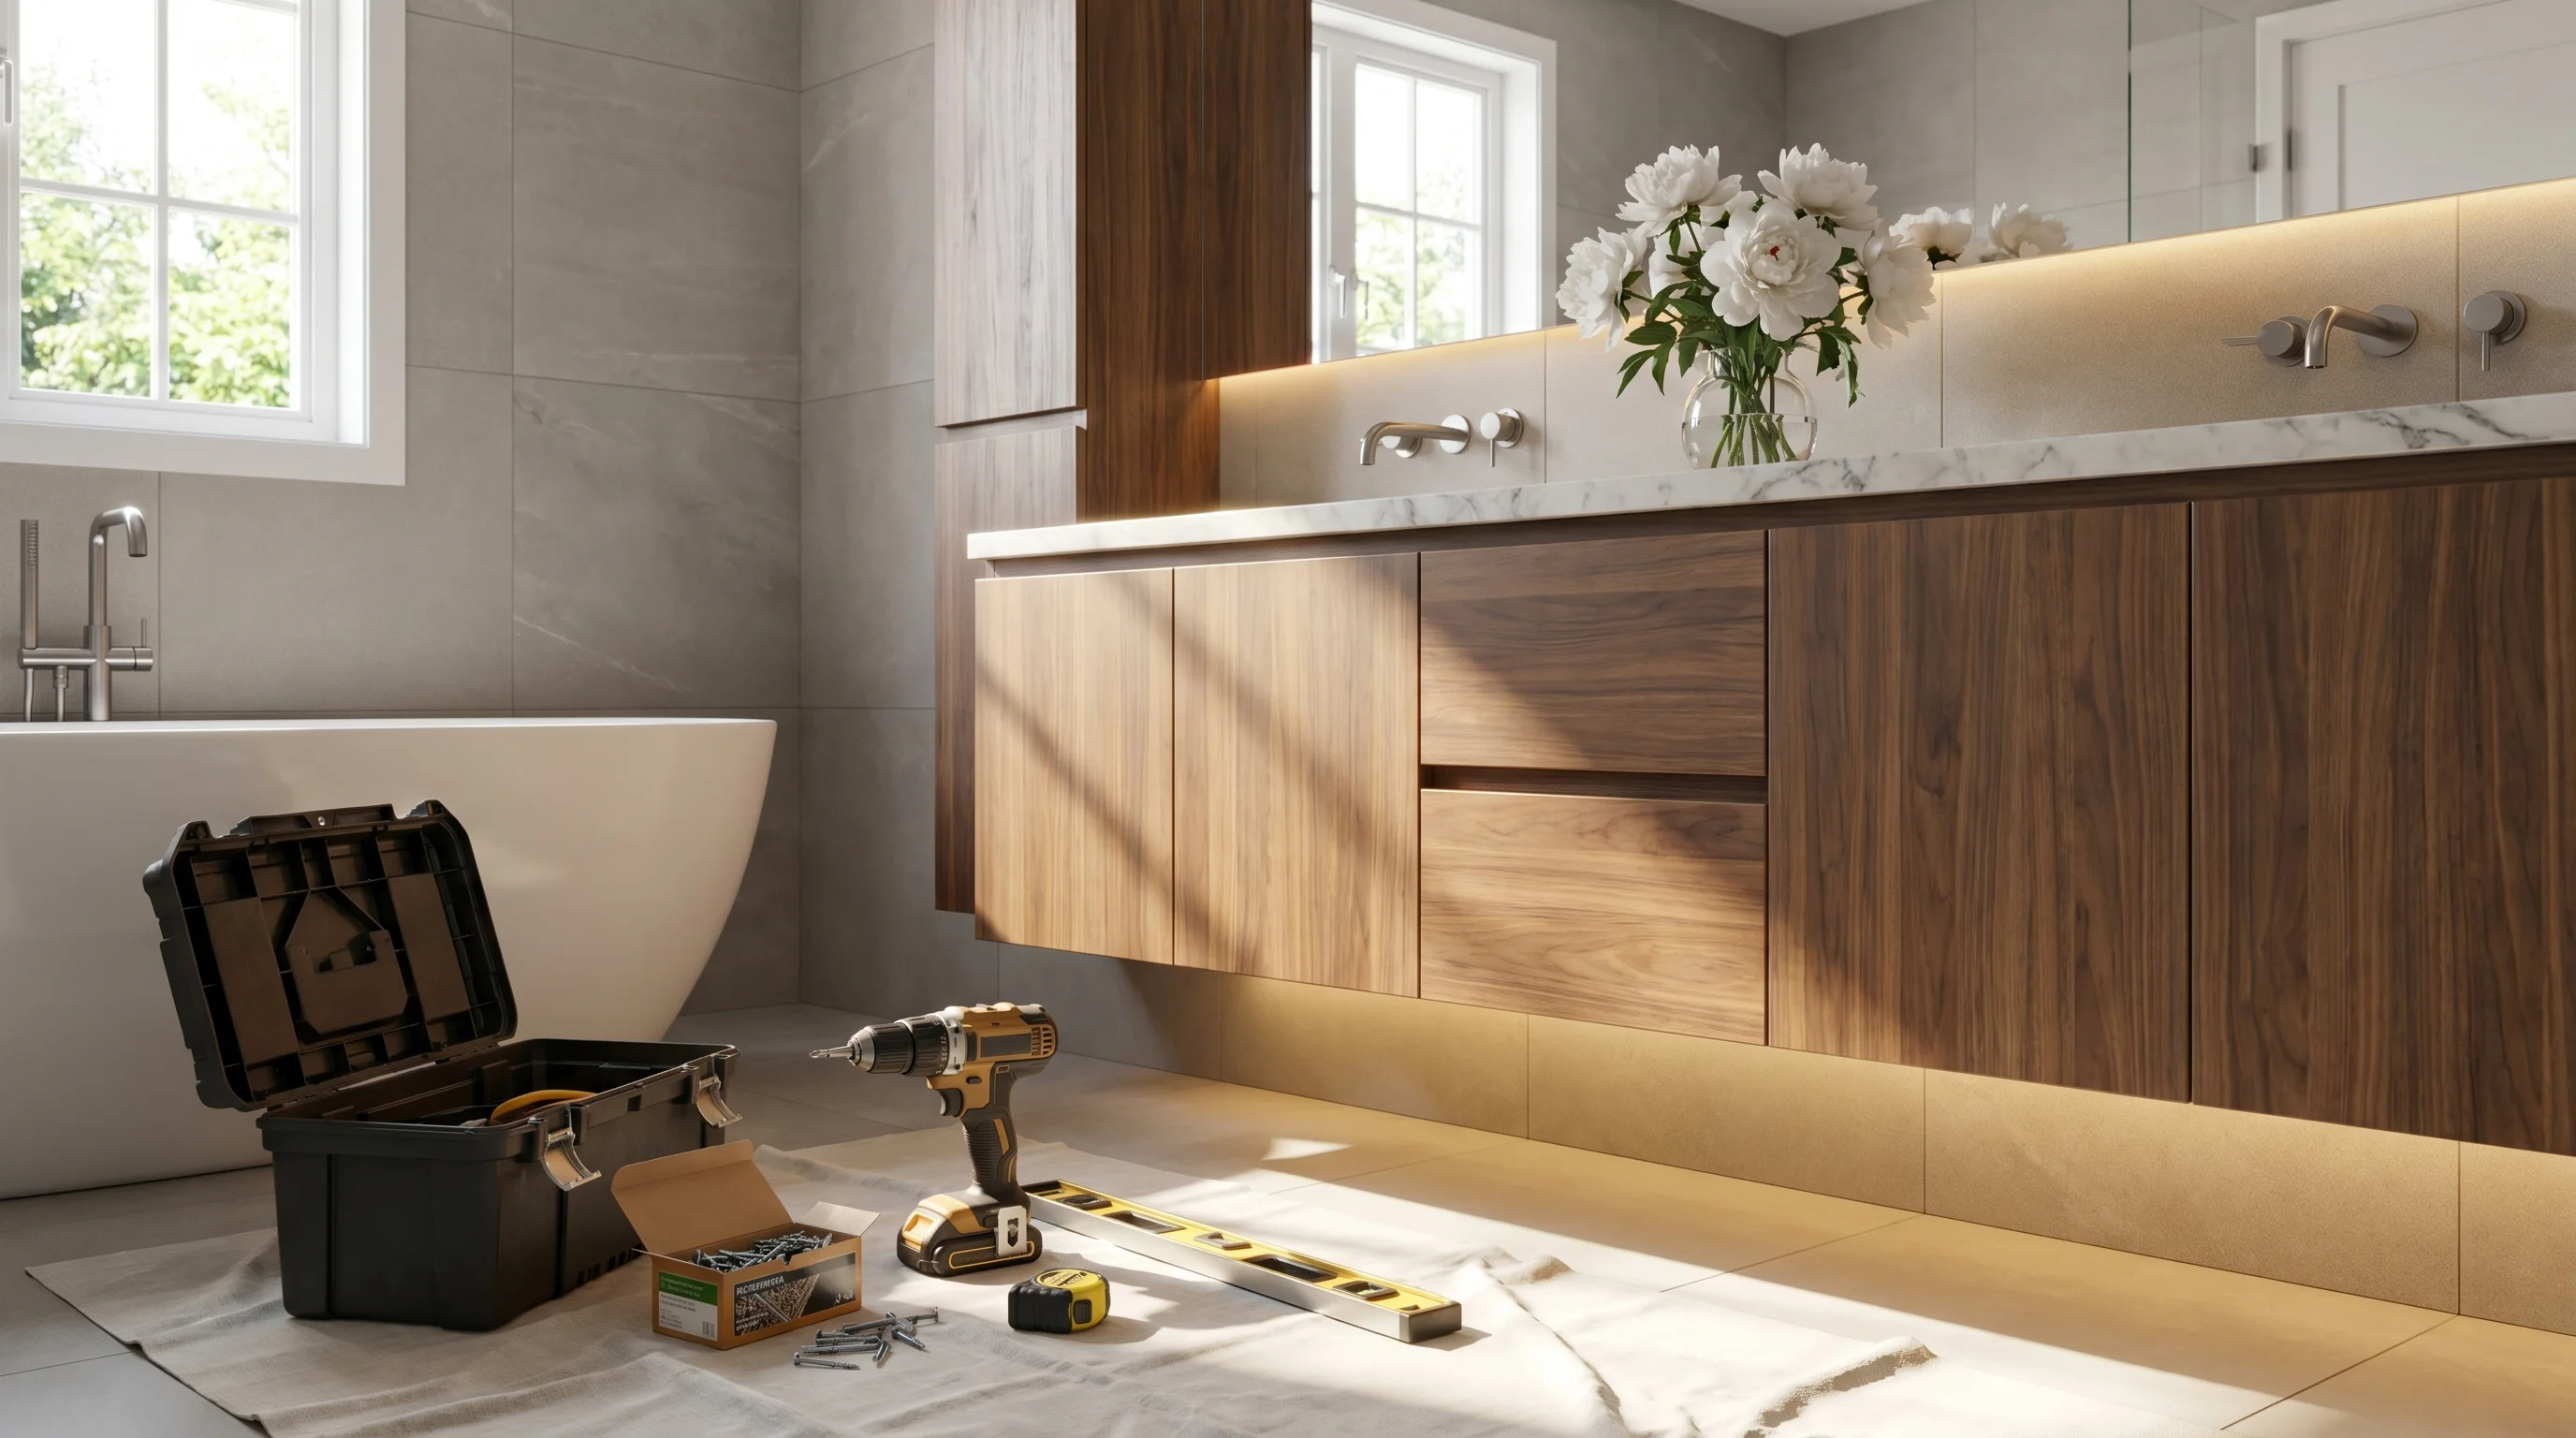
Tools and Materials You'll Need Before You Start
Getting the right tools together before you move the cabinet into position saves a lot of frustration. Here's what the job actually requires:
- 4-foot level (longer is better — a 2-foot level can miss a gradual slope)
- Composite shims — plastic or composite, not wood. Wood shims compress and rot over time in a bathroom environment
- Pencil and tape measure
- Oscillating multi-tool or handsaw — for trimming shims flush after leveling
- Drill and 3-inch screws — to anchor the cabinet to the wall studs
- Stud finder
- Silicone caulk — paintable, for sealing the gap at the floor line
- Adjustable wrench and plumber's tape — for supply line connections
One thing worth noting: Modern Vanity cabinets arrive fully assembled with soft-close hinges and drawer slides already installed. You're not building anything from flat-pack — you're positioning, leveling, and connecting. That cuts the install time significantly.
How to Measure Your Floor's Actual Slope
Before touching the cabinet, spend five minutes mapping your floor. Place your 4-foot level on the floor where the vanity will sit and note where the bubble sits. Then slide a shim under the low end until the bubble centers — the thickness of that shim tells you your total slope across that span.
Do this in both directions: front-to-back and side-to-side. A floor can slope in multiple planes, especially in older tile bathrooms where the tile was set over a mortar bed that's settled unevenly over the years.
Write down your measurements. If you're installing a 48-inch or 60-inch double-sink vanity, check the slope at both ends — a long cabinet can have different floor heights at each corner, and you'll need to shim all four points independently.
The Shimming Process: Corner by Corner
This is where most DIY installs go wrong. People try to shim the whole cabinet at once instead of working corner by corner.
- Set the cabinet in position without connecting any plumbing. Just place it where it will live.
- Check level side-to-side first. Slide composite shims under the low side until the bubble centers on your 4-foot level laid across the top of the cabinet.
- Check level front-to-back. If the cabinet tilts toward or away from the wall, shim the front feet or rear corners accordingly.
- Check all four corners. On a longer vanity, the middle of the cabinet can sag or bridge over a high spot — press down gently on the center of the cabinet top to check for any rocking.
- Once level, mark the shim positions with a pencil on the floor so you can reposition accurately after cutting your supply lines and drain rough-in.
The target: the cabinet top should be level within ⅛ inch across its full width. This matters because your quartz countertop sits directly on the cabinet — any twist in the cabinet box will show up as a gap between the countertop and the wall, or worse, stress cracks in the stone over time.
Anchoring to the Wall and Trimming the Shims
Once the cabinet is level, anchor it to the wall before you do anything else. Find the studs with your stud finder — in most GTA bathrooms, studs are 16 inches on center, though some older homes run 24-inch spacing. Drive 3-inch screws through the cabinet's mounting rail (the horizontal wood strip inside the upper back of the cabinet) into at least two studs. This is what keeps the cabinet from tipping forward when someone leans on the countertop.
With the cabinet secured, score the shims with your oscillating tool or handsaw flush with the cabinet edge. Don't snap them — snapping composite shims can shift the position slightly. Cut them clean.
Run a bead of paintable silicone caulk along the floor line where the cabinet meets the tile or floor. This closes the gap visually and keeps moisture from wicking under the cabinet base. Don't use expanding foam — it can actually lift a lightly shimmed cabinet if it cures under pressure.
Connecting Plumbing and Setting the Countertop
With the cabinet level and anchored, the plumbing connections are straightforward. The drain rough-in for most vanities should be 16–20 inches from the finished wall and 18–20 inches off the floor — if your rough-in is outside that range, a drain extension or offset kit handles it without moving the cabinet.
Supply lines (hot and cold) connect to the faucet, which on Modern Vanity sets comes pre-mounted on the quartz countertop. The countertop itself sits on top of the cabinet — no adhesive required for a standard install, though a few small beads of clear silicone on the cabinet's top edges will keep it from shifting.
Once the countertop is set, caulk the backsplash-to-wall joint with silicone. This is the joint that sees the most moisture, and it's the one most people skip — then wonder why there's water damage behind the vanity six months later.
If you're unsure about your specific rough-in situation or which size works for your bathroom, message us on WhatsApp at (647) 428-1111 before you order. It's faster than email and we can usually answer sizing and plumbing questions same-day.
A Note on Vanity Height After Shimming
Standard vanity height is 32–34 inches to the top of the countertop. If your floor is significantly out of level — say, ¾ inch or more — the shimming process will raise the low side of the cabinet, which can push the finished height above standard on that end. For most people this isn't noticeable, but if you're installing in a small bathroom where the vanity sits right next to a toilet, check that the shimmed height doesn't create an awkward height difference.
Modern Vanity cabinets are available in six sizes from 24 to 60 inches, all at a standard 34-inch cabinet height before the countertop. The complete sets — cabinet, quartz countertop, ceramic undermount sink, backsplash, and brushed nickel hardware — start at $499 for the 24-inch and go up to $1,299 for the 60-inch double sink. Everything ships to the GTA with free warehouse pickup, or $140 for garage delivery and $200 for inside-the-house delivery.
Browse the full lineup at modernvanity.ca/vanities, or check the FAQ if you have questions about delivery or rough-in specs before you order.