How to Remove and Replace a Bathroom Vanity (Step-by-Step)
The average bathroom vanity gets replaced after 15 to 20 years — not because it stops working, but because the laminate delaminates, the hinges fail, or the countertop cracks and a replacement surface costs more than a whole new unit. If you're at that point, the good news is that a vanity swap is one of the more approachable DIY renovations in a home. No drywall demolition, no electrical work (usually), and no specialized skills — just plumbing basics, a few tools, and a couple of hours of focused effort.
Tools and Materials You'll Need Before You Start
Don't start demo day without everything on this list. A mid-job hardware store run kills momentum and adds hours.
- Adjustable wrench and channel-lock pliers
- Utility knife (for cutting caulk and silicone beads)
- Putty knife or 5-in-1 tool
- Bucket and towels (water will spill — plan for it)
- Cordless drill/driver
- Stud finder
- Level (48" is ideal)
- Measuring tape
- Silicone caulk and caulk gun
- Teflon tape (plumber's tape)
- Pencil for marking the wall
Optional but useful: a headlamp for working under the cabinet, and a helper for lifting the countertop off if it's a separate piece.
Step 1 — Shut Off Water and Disconnect the Plumbing
Locate the shutoff valves under the sink — there should be two (hot and cold). Turn them clockwise until they stop. Turn on the faucet to release pressure and confirm the water is off. Then:
- Place your bucket under the P-trap (the curved pipe under the drain).
- Unscrew the P-trap slip nuts by hand or with pliers. Water will drain out — that's what the bucket is for.
- Disconnect the supply lines from the shutoff valves using your adjustable wrench. These are usually 3/8" compression fittings.
- If your faucet is staying, leave it attached to the countertop and remove both together. If you're replacing the faucet too, disconnect it from the supply lines now.
Pro tip: Take a photo of the drain and supply connections before you disconnect anything. You'll thank yourself during reinstallation.
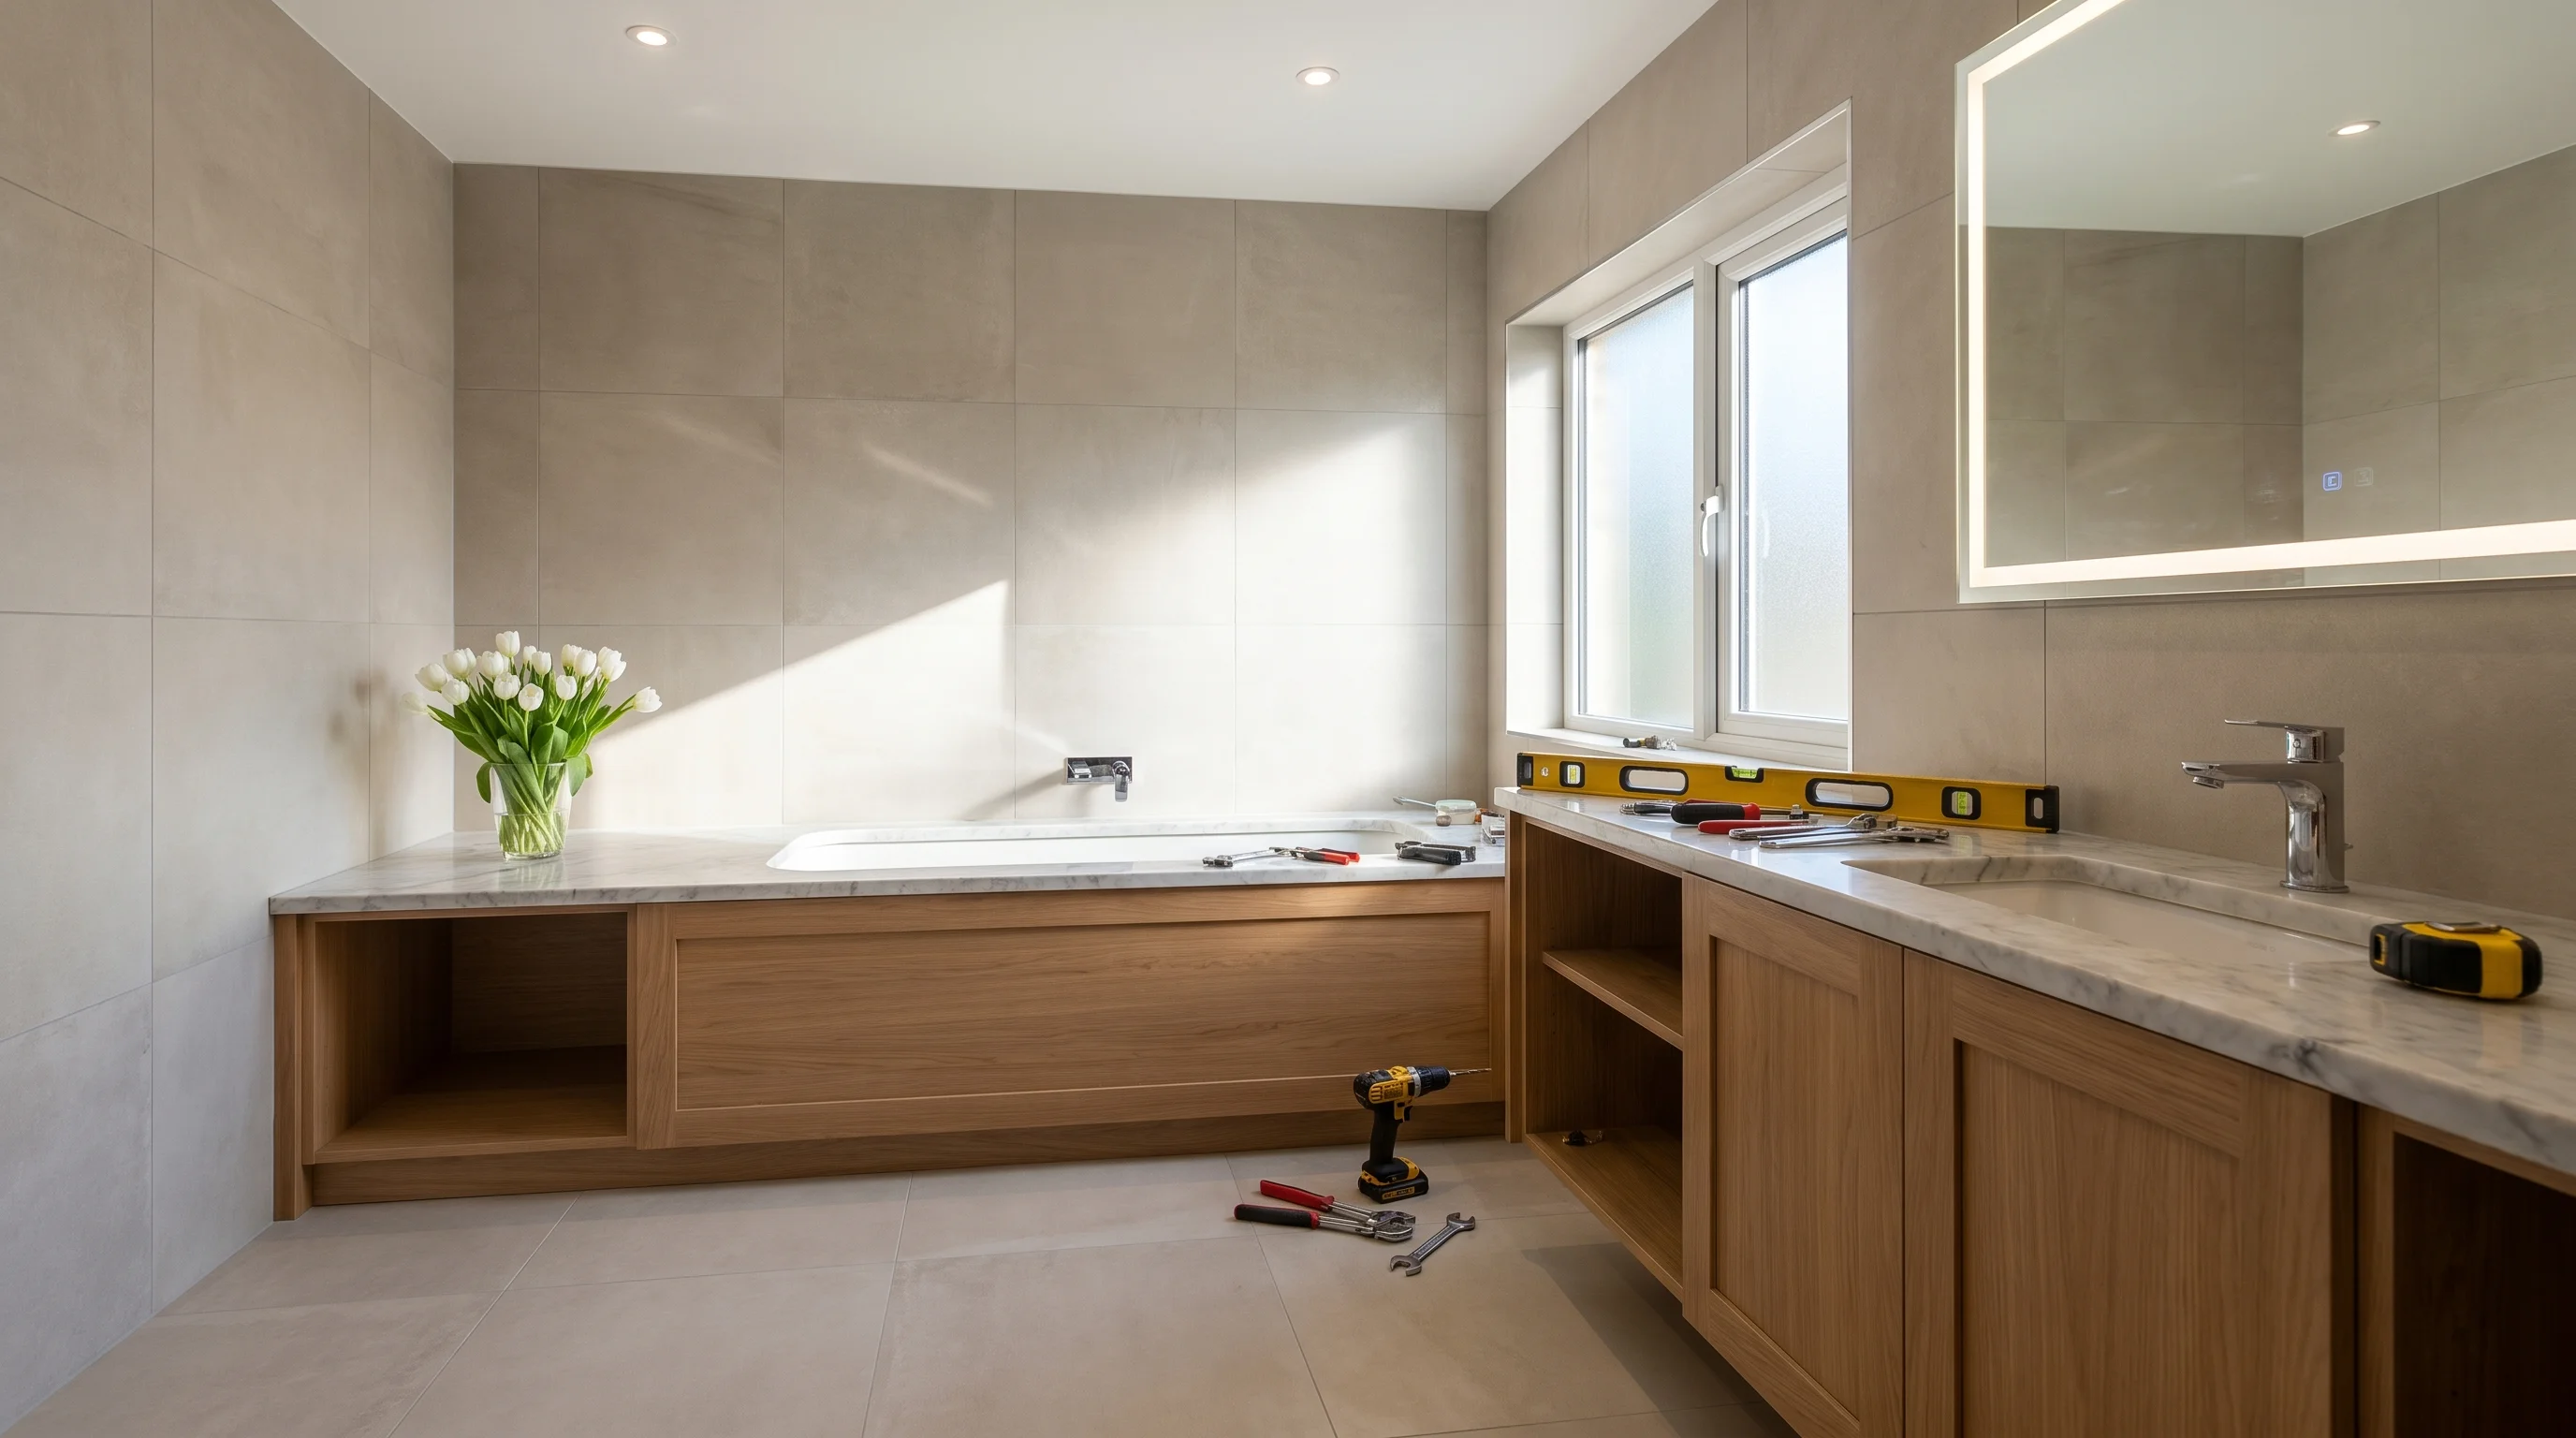
Step 2 — Remove the Old Countertop, Then the Cabinet
Most vanity countertops are either siliconed to the cabinet or screwed from underneath — sometimes both. Run your utility knife along every caulk line where the countertop meets the wall and where the cabinet meets the floor. This breaks the seal and prevents tearing drywall when you lift.
If the countertop is a separate piece (common on older vanities with a drop-in sink), lift it straight up. It may be heavy — cultured marble tops on older units can weigh 40–60 lbs. Have a second person ready.
Once the top is off, look inside the cabinet for mounting screws going into the wall studs. These are usually near the top corners of the cabinet box. Remove them. Then slice the floor caulk line and pull the cabinet away from the wall. It should come free without much resistance. If it feels stuck, check for additional silicone or screws you missed.
Inspect the wall and floor once the cabinet is out. Look for water damage, soft drywall, or mold — especially around the drain area. Address any damage before the new vanity goes in. Skipping this step is how small problems become expensive ones.
Step 3 — Prep the Space for the New Vanity
Before the new cabinet touches the floor, do three things:
- Measure the rough-in plumbing. The drain center and supply line positions need to align with your new vanity's cabinet cutouts. Standard rough-in drain height from the floor is 16" to 20". Supply lines typically come out of the wall between 20" and 22" off the floor. Most modern vanities are designed around these ranges — but confirm your new unit's specs against your actual measurements.
- Check the floor for level. Set your level on the floor where the cabinet will sit. If the floor is out of level by more than 1/4", you'll need to shim the cabinet. An unlevel vanity causes doors to swing open or closed on their own and puts stress on the countertop.
- Mark your stud locations. Use your stud finder and mark the studs on the wall where the cabinet back will sit. You'll need at least two screws into studs to anchor the cabinet securely.
Step 4 — Install the New Vanity Cabinet
This is where pre-assembled vanities save significant time. Modern Vanity's complete sets arrive fully assembled — cabinet, soft-close hinges, soft-close drawer slides, and hardware already installed. You're not building furniture; you're positioning and anchoring it.
Slide the cabinet into position. Feed the supply lines and drain through the cabinet's back cutouts. Check level front-to-back and side-to-side. Shim the base if needed, then drive 2.5" screws through the cabinet's mounting rail into the wall studs. Two screws minimum — three if you can hit three studs.
Once the cabinet is anchored, apply a thin bead of silicone along the cabinet-to-wall seam at the back. This prevents moisture from getting behind the unit.
Step 5 — Set the Countertop and Reconnect Plumbing
Modern Vanity sets include a quartz countertop with a ceramic undermount sink pre-installed — meaning the countertop and sink arrive as one unit. No separate sink mounting, no drilling, no sealing the sink bowl to the stone. Set the top onto the cabinet, confirm the overhang is even on both sides, and run a bead of silicone around the perimeter where the countertop meets the wall.
Now reconnect the plumbing in reverse order:
- Install the P-trap — hand-tighten the slip nuts, then snug them with pliers (don't overtighten plastic fittings).
- Connect the supply lines to the shutoff valves using Teflon tape on the threads.
- Connect the supply lines to the faucet inlets (if replacing the faucet, install it before setting the countertop — it's much easier to work from above).
- Turn the shutoff valves back on slowly. Check every connection for drips. Run water through the drain and watch the P-trap for leaks.
Caulk the countertop-to-wall seam with a color-matched silicone. Smooth it with a wet finger. Let it cure for 24 hours before heavy water contact.
Sizing: Match Your New Vanity to the Existing Rough-In
The easiest replacement is same-size-for-same-size. If your old vanity was 36 inches wide, a new 36" unit drops in with minimal wall patching. Going larger requires checking that the drain and supply lines still fall within the new cabinet's cutout range — usually not a problem within one size up.
Available sizes at Modern Vanity: 24", 30", 36", 42", 48", and 60" — with double-sink configurations at 48" and 60". If you're considering a 30" vanity, that's typically the right fit for a powder room or secondary bathroom with a single-user footprint.
Pricing runs from $499 for the 24" set to $1,299 for the 60" double-sink — and every set includes the quartz countertop, ceramic undermount sink, backsplash, and brushed nickel hardware. Nothing to source separately.
Questions about whether your plumbing lines up with a specific size? Message us on WhatsApp at (647) 428-1111 — send your measurements and we'll tell you exactly what fits.
Browse all vanity sizes and colours online, or check the FAQ for delivery and installation details. Free warehouse pickup available, or delivery to your garage or inside your home in the GTA.